THE SHORT ANSWER
How do you create a gallery wall that looks balanced?
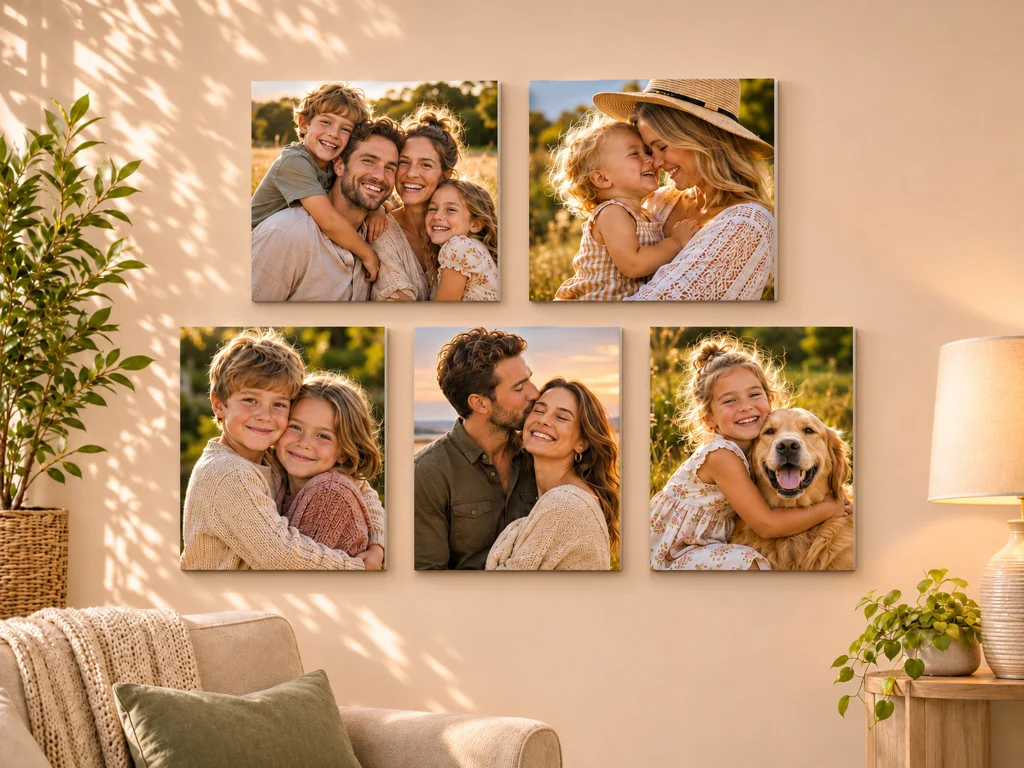
Start with a theme, choose a layout, and measure the entire arrangement before mounting anything. For a clean photo gallery wall, try four matching square prints in a 2-by-2 grid or six in a 3-by-2 grid. Leave about 2 to 3 inches between pieces, keep the gaps consistent, and use paper templates to preview the design on your wall. The best arrangement is the one that suits your photos, your furniture and the size of your space.
You do not need an interior designer, matching professional photographs or an enormous blank wall. You need a repeatable plan and pictures that mean something to you.
The best gallery walls do more than fill empty space. They turn the photos you keep on your phone into something you see every day: the dog who photobombed every vacation, the family weekend everyone still talks about, or the landscape you wish you could revisit.
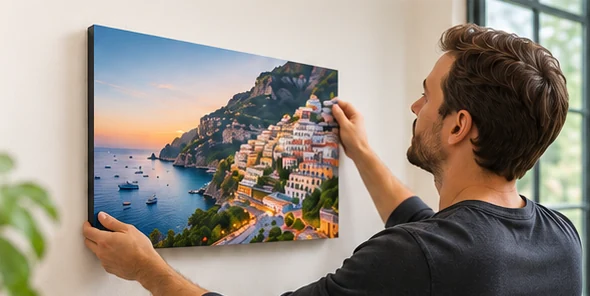
This guide covers gallery wall layout ideas, photo sizes, spacing, hanging height and design mistakes. You will also see how frameless PicPanels photo bundles can simplify the process without forcing you to buy conventional frames.
01 / START WITH YOUR SPACE
Choose your photos and a visual direction first
Before measuring the wall, decide what the collection should feel like. A gallery of related photos looks intentional even when the pictures were taken in different years.
- Family moments: candid portraits, milestones, holidays and everyday memories.
- Travel stories: your favorite cities, beaches, mountain trails and road trips.
- Pets and people: a playful mix of portraits with photos of the animals who belong in the family.
- Nature and color: landscapes that share a palette, such as warm sunset tones or muted blues and greens.
Choose one element to tie the photos together. That might be a consistent crop, a similar level of brightness, a single color family or the same physical print size. You can mix subjects, but avoid giving every photo a different visual treatment.

02 / PICK A LAYOUT
Four gallery wall layouts that work in real homes
LAYOUT 01 / THE SIMPLEST START
The 2-by-2 square grid
Use four matching square photos in two rows and two columns. Align all outer edges and keep the horizontal and vertical gaps equal. This is a strong choice for a small living room, bedroom, entryway or narrow wall.
Best for: four related pictures, symmetrical spaces and people who prefer a calm modern look.
LAYOUT 02 / THE FAMILY FAVORITE
The 3-by-2 photo wall
Arrange six equally sized photos across three columns and two rows. It gives you room to tell a fuller story while maintaining the visual order of a grid. Try alternating close-up portraits with wider scenic photographs so the arrangement does not feel repetitive.
Best for: above a sofa, a large hallway and family or vacation collections.
LAYOUT 03 / ROOM TO GROW
The 4-by-2 gallery
Eight same-size prints arranged in four columns and two rows create a broad horizontal gallery. It is especially effective over long furniture, provided the finished arrangement fits the available wall width. Begin with four images and build toward eight if you prefer to expand gradually.
Best for: wide walls, corridors and growing family photo collections.
LAYOUT 04 / A MORE EDITORIAL LOOK
The anchor-and-surround arrangement
Begin with one larger photo as the visual anchor, then place smaller images around it. Keep a consistent gap where possible and balance the weight of dark, bright and colorful images across the group. This style is less formal than a square grid, but it still needs careful measuring.
Best for: mixed portrait and landscape photos, collected artwork and eclectic interiors.
SQUARE OR RECTANGULAR?
Let the shape of your photos guide the layout
A consistent square format is easy to line up. Rectangular prints often preserve more of the original composition in portraits and landscapes. If several photos are important, compare the crop in each format rather than choosing a shape only because it fits the furniture.
PicPanels offers both gallery-friendly photo bundles and other custom print options. Check the live product page for available sizes and pack quantities.
03 / MEASURE IT ONCE
Gallery wall spacing and sizing: the practical numbers
Design starting point: Aim for consistent gaps of roughly 2 to 3 inches. On an open wall, placing the center of the entire arrangement around 57 to 60 inches from the floor is a useful guide. Above a sofa, prioritize a comfortable gap above the furniture instead of forcing an exact eye-level measurement.
The key is to measure the group, not only the individual prints. A row of four panels has three gaps between them, not four. Forgetting the gaps is one of the easiest ways to plan a layout that will not fit.
The gallery wall width formula
Total width = (number of columns × panel width) + ((number of columns − 1) × gap). Apply the same calculation to rows for the total height.
For example, four 8-inch-square photos in one row with 2-inch gaps need 38 inches of width: (4 × 8) + (3 × 2) = 38 inches.
Example dimensions for square photo grids
| Arrangement | Gap | Overall width | Overall height |
|---|---|---|---|
| 4 × 8-inch square panels, 2 × 2 | 2 in | 18 in | 18 in |
| 6 × 8-inch square panels, 3 × 2 | 2 in | 28 in | 18 in |
| 8 × 8-inch square panels, 4 × 2 | 2 in | 38 in | 18 in |
| 4 × 12-inch square panels, 2 × 2 | 2 in | 26 in | 26 in |
| 4 × 16-inch square panels, 2 × 2 | 2 in | 34 in | 34 in |
How high should you hang a gallery wall?
For an unobstructed wall, a common starting point is to put the visual center of the full grouping roughly 57 to 60 inches from the floor. Above a sofa or console, many arrangements look more connected to the furniture when the bottom edge begins roughly 6 to 10 inches above it. These are flexible design guidelines, not installation requirements.
When furniture anchors the display, take a photo of the room and inspect how the full group relates to the sofa, desk or console. A perfectly measured grid can still feel too high or too small if it ignores the proportions of the room.

04 / MAKE YOUR PHOTOS LOOK THEIR BEST
Choose the right photo crop, color and print size
Your phone camera probably contains plenty of images worth displaying. The tricky part is choosing which ones look good together and whether their crops will work at the intended print size.
- Protect the subject: review every crop and keep faces, pets, landmarks and important details away from the trimmed edges.
- Mix wide and close: combine environmental scenes with close-up subjects so every image has its own role.
- Watch brightness: a very dark photograph next to three pale images can feel visually heavy. Adjust the order or editing to balance the wall.
- Use the original file: upload the highest-quality photo available rather than a screenshot or compressed social-media download.
- Check orientation: a landscape photo may need significant cropping in a square layout, while a tall portrait may fit a rectangular format better.
If you are building a photo wall as a gift, add one meaningful image that tells the story instantly: a wedding portrait, a family reunion, a child’s first day of school or a much-loved pet. Then let the surrounding images fill in the details.
05 / PLAN BY ROOM
Gallery wall ideas for living rooms, bedrooms, hallways and offices
Living room: build around the sofa
Choose four, six or eight photos that share a theme, and align the overall grouping with the furniture. If your sofa is long, a horizontal arrangement often feels more natural than a narrow vertical stack.
Hallway: make the walk a story
Try a chronological collection of family memories or travel locations. Consistent sizes and a clear horizontal centerline make a narrow hallway gallery feel organized rather than crowded.
Bedroom: keep it personal and quiet
A smaller grid of four photographs can feel more restful than a busy collection. Use soft light, familiar places or a coordinated color palette.
Home office: create a visual reset
Mix favorite destinations, personal milestones and photographs that make you happy to look up from your desk. Leave enough clear wall around each piece so it does not compete with monitors and shelves.

06 / FROM PLAN TO WALL
How to build your gallery wall step by step
STEP 1
Measure the available space
Measure the usable wall width and height, including the space around doorways, switches, furniture and nearby decor.
STEP 2
Choose a layout and calculate the footprint
Use the width formula above. For a grid, decide the number of columns and rows before you choose final sizes.
STEP 3
Arrange photos on the floor
Place the prints or paper cutouts in the intended order. Swap photos until the balance of color, subjects and spacing feels right.
STEP 4
Preview the exact arrangement on the wall
Use painter’s tape or lightweight paper templates only where the wall finish permits. View the layout from across the room and from the doorway.
STEP 5
Mount according to the product instructions
Check the wall surface, the finished print weight and the mounting system. Use the supplied mini level where applicable, and do not substitute generic adhesive advice for the actual product instructions.
STEP 6
Inspect the complete wall
Check outer edges, consistent gaps and visual alignment. Take a photograph of the finished arrangement; it is often easier to spot imbalance in a photo.
For mounting guidance specific to PicPanels, visit the PicPanels hanging guide. For other nail-free display options and wall-surface precautions, see our first article, How to Hang Pictures Without Nails or Damaging Walls.
07 / PRINT THE PHOTOS YOU LOVE
Why frameless PicPanels work especially well for photo walls
A conventional frame is one way to make photos feel finished, but it adds visible borders and often extra weight. PicPanels use lightweight, rigid, ½-inch-thick white foam to keep the artwork visually prominent. The exposed white edge makes the panel look deliberate without a separate decorative frame.
PicPanels photo panels come with four circular adhesive mounting pads and a mini bubble level. Always verify that the supplied pads are compatible with your wall, follow the included mounting and removal instructions, and avoid delicate or unsuitable finishes. No adhesive system can promise zero paint damage in every situation.
MAKE YOUR OWN GALLERY WALL
Your favorite photos deserve a place on the wall.
Start with a small coordinated set or build a larger photo wall over time. Choose your layout, select the photos that matter most and explore the available PicPanels sizes and bundles.
Want to start with a single photo? Create custom photo wall art.
YOUR QUESTIONS, ANSWERED
Frequently asked questions about gallery walls
How many pictures should be in a gallery wall?
Four matching pictures are enough for a simple 2-by-2 grid. Six or eight photos work well on wider walls, and a three-piece set can also make a strong statement. Choose the number by measuring the space rather than trying to fill every inch.
How far apart should photos be on a gallery wall?
About 2 to 3 inches is a useful starting range for many small and medium photo arrangements. Smaller prints can look good with slightly tighter gaps, while larger pieces may need more breathing room. Consistency matters more than one exact number.
What is the best height for a gallery wall?
On a clear wall, begin with the visual center of the full arrangement roughly 57 to 60 inches above the floor. Above furniture, use the relationship to the sofa, console or bed to guide placement, often leaving around 6 to 10 inches of space beneath the artwork.
Can I mix square, vertical and horizontal photos?
Yes. A mixed gallery wall works best when the prints still share a visual theme or a consistent gap. Start with one anchor image, plan the overall silhouette and preview the placement before hanging.
Can I make a gallery wall without nails?
Often, yes, especially with compatible lightweight foam photo panels and the mounting pads intended for them. Check the adhesive system’s weight and surface restrictions first. On delicate finishes, an existing picture rail or safe freestanding display may be a better choice.
Are PicPanels the same as paper posters?
No. A PicPanel is a rigid ½-inch white foam photo print with a frameless edge. A poster is printed paper and may require a different method of display. Choose based on the look, weight, mounting method and format you want.
Ready to plan yours? Pick your favorite four photos and start with one simple layout. You can always add another row when more memories deserve a spot.